The Alameda Flea

One of the many perks of living in San Francisco are the vintage stores/flea markets. I love anything vintage. I like that vintage items have stories and history behind them – who knows how many lives it has lived before it made its way to you. I especially have a love of vintage jewelry. My wedding  band is vintage – from 1906 and we got it from this great store in SF called Diane’s. I am not much of a shopper, but this is definitely one of those places that I could get lost in. Make sure to check it out if you ever find yourself in SF and looking for some eye candy.

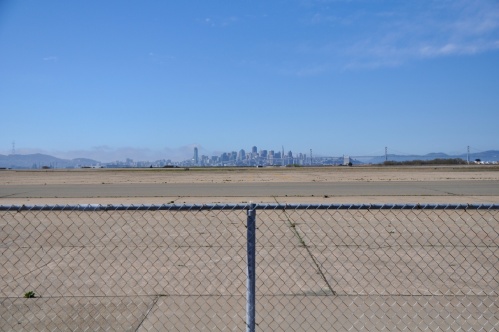
Another treasure trove of vintage goodness is the Alameda flea market – officially called the Alameda Point Antiques Faire (but that is a mouth full). Once a month vintage vendors from all over the Northwest converge on an abandoned naval air base that overlooks the SF skyline.  Here is more information on it – but it is basically the largest antiques fair in Northern California.  The fair has over 800 vendors and all items must be over 20 years old –  so it is a great resource for all things vintage. I try to go as often as I can – mainly to wander and see what is out there. But you have to be in the right mood for this flea market – it is intense – physically and mentally. It is literally thousands of people strolling, shopping, shoving,  and eating their way through hundreds of vendors.

Alameda Flea 19

The flea market has anything and everything that you could wish for. A lot of it is bizarre –  like these crazy dolls or vintage mannequins – but one man’s garbage is another man’s treasure – right? (For the record, both of these things scared me – those dolls are the stuff nightmares are made of)

Alameda Flea 3 Alameda Flea 28

But I did find some great items –  there were a couple of themes from the day – Native American inspiration and vintage maps. Take a look at the pics below.

Native American Inspiration 

** The picture is not very good, but these prints were stunning. They would look great with a  new, more vibrant frame.

Alameda Flea 4

**Vintage skull – yes a little morbid but would look great above a  fireplace

Alameda Flea 6

**Love the beading and the fringe on this 
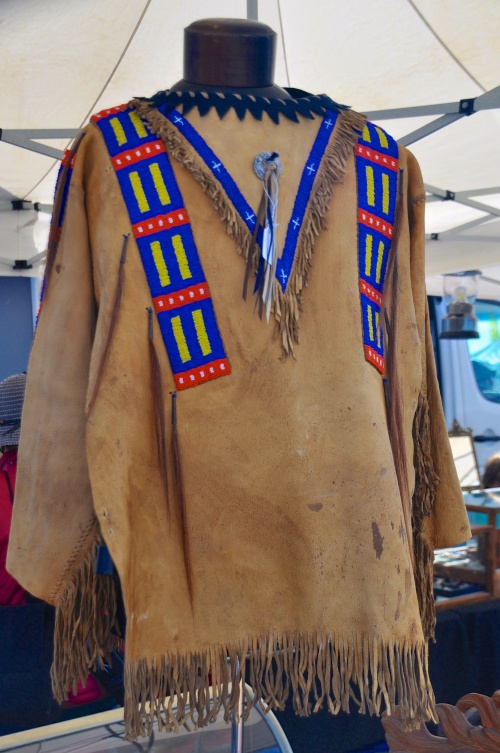
Alameda Flea 11

** If I lived in a fab mid-century modern house, I might put these guys by the front door as the welcoming committee
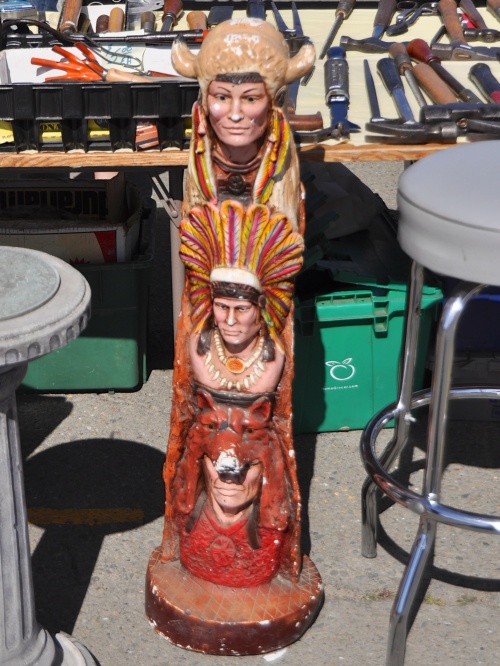
Alameda Flea 33

**Not sure what this was (some sort of bag/wall covering), but loved the print

Alameda Flea 12

Map Lovin’

**Vintage map of San Francisco from 1909
Alameda Flea 9

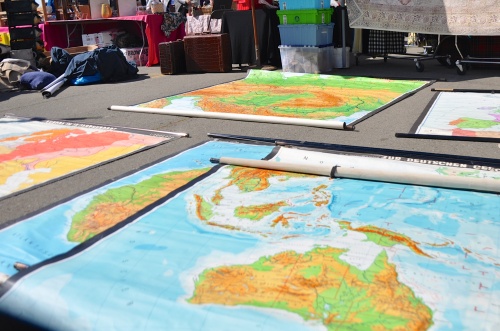
**Vintage pull down school maps from Germany (this was actually my only purchase of the day – I got a map of Europe from WWI – not sure what I am going to do with it, but it seemed cool at the time….)

Alameda Flea 17

** I used to have one of these globes as a kid and loved spinning it and randomly putting my finger down is some far off land
Alameda Flea 10

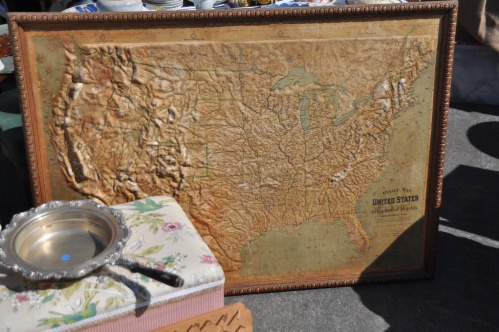
**Love the texture on this map. Needs to be cleaned up but could be great above a desk or in a little boys room.

Alameda Flea 30

If you are loving all things maps or find inspiration in Native American motifs – here are some good options you can get online:

I love this image from the great website, Society6:

Native American Headress

Also, Etsy is always a great resource for art, so if you are looking for some vintage maps, check out Knick of Time. This is my favorite from their store (biased because I grew up in Florida):

Florida vintage Map

Below are some more highlights from Alameda  – check out the full round-up in my Flickr account

**Great way to upcycle old skateboards. I can see these in a kids room or in a beach house

Alameda Flea 27

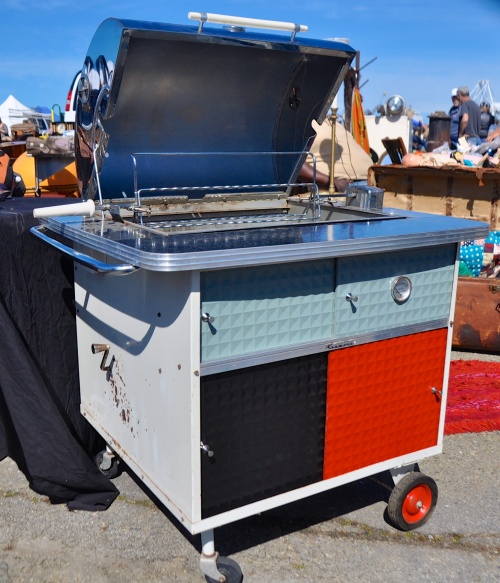
** 1960’s barbecue grill. I loved this – if I had a house, I would have sprung the $400 for it. It still works – all it needs is some charcoal. How chic would I be grilling on this thing?

Alameda Flea 20

**Mid-century madness

Alameda Flea 32
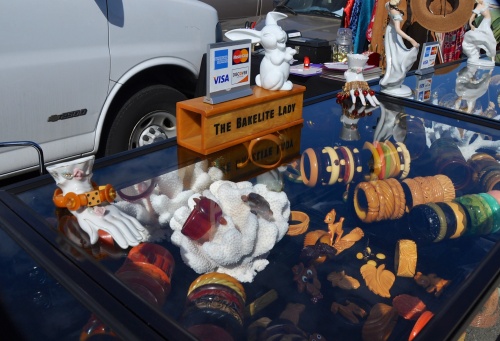
**Bakelite!! If you don’t know, Bakelite is my new obsession – I blame Palm Springs

Alameda Flea 7

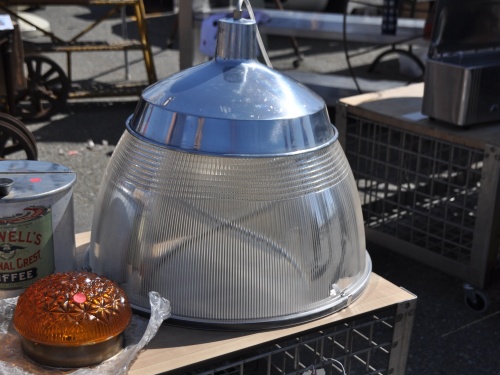
**Loved these vintage pendants for $300. This is one of a pair. They would look great over a large kitchen island. Sadly I don’t have a large island and don’t envision a large one for many many years, but maybe one day I will find these again…
Alameda Flea 29

Like I mentioned before, this flea market takes place on an abandoned naval air base that is huge – over 1,500  acres.  The fair only uses a tiny portion of it. The city of Alameda is trying to revive it but sadly most of it is still empty and abandoned. The buildings left on the base are beautiful, sad and almost haunting. The base had its heyday during the middle of the twentieth century and officially closed in 1997. Even though it is abandoned – it still has an incredible view.

Alameda Flea 36

5 Comments

Filed under Design, Life

ALT NYC here I come…

ALTNYCJune2013w

Whaoo! I signed up for Alt Summit NYC this morning and am so excited. Alt Summit is a blogging resource that holds these really great networking events all over the county. Plus this year’s NYC event is going to be a the Martha Stewart headquarters!  I definitely wouldn’t miss a chance to be in Miss Martha’s aura  or get back to NYC for that matter.

What are your plans this weekend? I have nothing on the agenda except eating pizza like we do every Friday night – mostly likely at Pizetta 211 (best place ever) – and maybe checking out the Alameda Flea Market on Sunday.

Happy Friday..finally!

Leave a comment

Filed under Life

Zoot Alors!

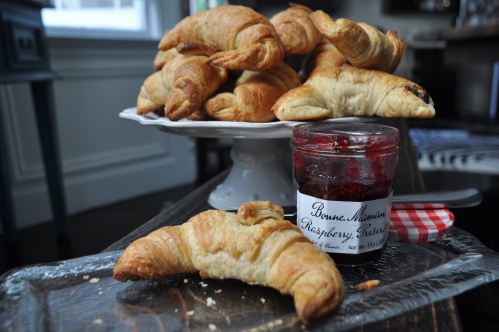
croissants 10

I must admit that I love all things French. I know that is not very original, but I do. I love the language, the food, the wine and the people. I most of all love Paris. I actually blame this on my parents because I took French classes from kindergarten through the end of high school. I did not learn a single word of the language… but I did find my love of all things French.

A couple of years ago I was fortunate enough to spend my 30th birthday in Paris. If I had to welcome in 30…I was going to spend it in the best place in the world.  (i.e. less chance of a “I can’t believe I am 30”  breakdown when you have a bottle of wine in one hand and a pastry in the other)

OLYMPUS DIGITAL CAMERA

Luke and I went for Thanksgiving and had the best time. We rented an apartment in the 6th which was amazing. (If you are ever looking here is the apartment – it is seriously the best location) We spent the week roaming the city and eating and drinking anything we could get our hands on.

OLYMPUS DIGITAL CAMERA OLYMPUS DIGITAL CAMERA

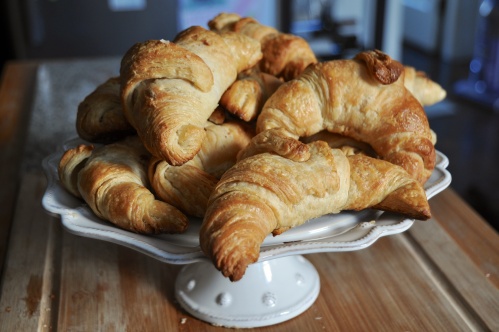
So in an attempt to re-create the amazingness of that week (or just get that much closer to being a real life French person) I decided to tackle a homemade croissant. Silly I know when I can get  amazing ones at  Tartine Bakery here in San Francisco- but I guess it was the challenge that was calling me.

In the process, I found out that making croissants are not that difficult, instead they just take forever. Literally forever. I started making these suckers on a Saturday at 2pm and did not finish until 3pm on Sunday. So don’t start croissants thinking you will have a buttery flacky one in an hour or so. You got to put in the time to reap that reward.

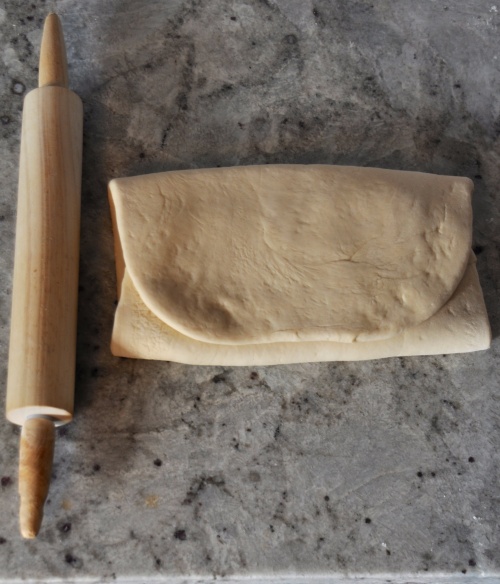
croissants 1 croissants 2 croissants 3 croissants 4 croissants 5

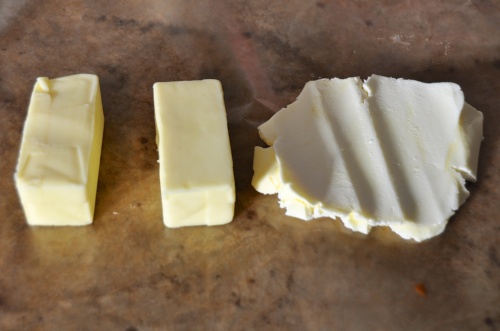
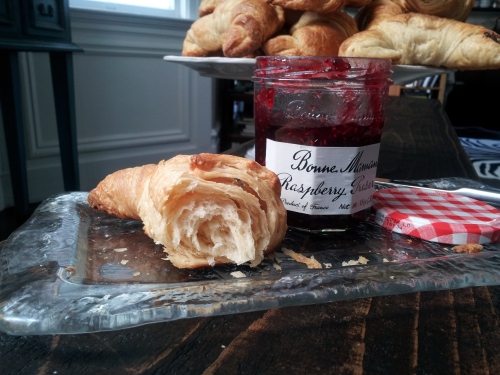
The trick with croissants are the layers of butter (see above). When the butter is layered between the dough and it hits the heat of the oven, that is when you get the flaky deliciousness that we all love in croissants.

croissants 6 croissants 7croissants 12croissants 15

I also cut up some bittersweet chocolate and added it to some of the croissants – but you can keep it all butter, or add any filling you can dream of.

Be warned there is a ton (literally just about a ton) of butter in this recipe but don’t think about it, just eat and enjoy!

Butter Croissants

Adapted from Gourmet, October 2000

  • 1 1/2 cups whole milk, heated to warm (105°F–110°F)
  • 1/4 cup packed light brown sugar
  • 1 tablespoon plus 1/4 teaspoon active dry yeast (from two 1/4-oz packages)
  • 3 3/4 to 4 1/2 cups unbleached all-purpose flour
  • 1 tablespoon kosher salt
  • 3 sticks (1 1/2 cups) cold unsalted butter

Make dough:
Stir together warm milk, brown sugar, and yeast in bowl of standing mixer and let stand until foamy, about 5 minutes. (If it doesn’t foam, discard and start over.) Add 3 3/4 cups flour and salt and mix with dough hook at low speed until dough is smooth and very soft, about 7 minutes.

Transfer dough to a work surface and knead by hand 2 minutes, adding more flour as necessary, a little at a time, to make a soft, slightly sticky dough. Form dough into a roughly 1 1/2-inch-thick rectangle and chill, wrapped in plastic wrap, until cold, about 1 hour.

Prepare and shape butter:
After dough has chilled, arrange sticks of butter horizontally, their sides touching, on a work surface. Pound butter with a rolling pin to soften slightly (butter should be malleable but still cold). Scrape butter into a block and then put it between two sheets of parchment or wax paper. Pound and roll out on both sides until butter forms a uniform 8- by 5-inch rectangle. Chill, while rolling out dough.

Roll out dough:
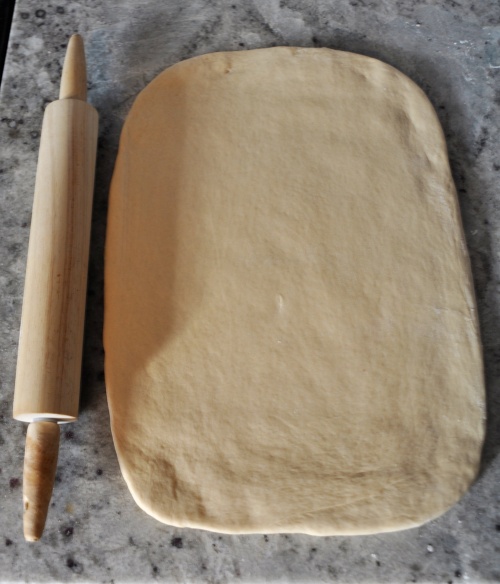
Unwrap dough and roll out on a lightly floured surface, dusting with flour as necessary and lifting and stretching dough (especially in corners), into a 16- by 10-inch rectangle. Arrange dough with a short side nearest you. Put butter in center of dough so that long sides of butter are parallel to short sides of dough. Fold as you would a letter: bottom third of dough over butter, then top third down over dough. Brush off excess flour with pastry brush.

Roll out dough:
Turn dough so a short side is nearest you, then flatten dough slightly by pressing down horizontally with rolling pin across dough at regular intervals, making uniform impressions. Roll out dough into a 15- by 10-inch rectangle, rolling just to but not over ends.

Brush off any excess flour. Fold in thirds like a letter, as above, stretching corners to square off dough, forming a 10- by 5-inch rectangle. (You have completed the first “fold.”) Chill, wrapped in plastic wrap, 1 hour.

Make remaining “folds”:
Make 3 more folds in same manner, chilling dough 1 hour after each fold, for a total of 4 folds. (If any butter oozes out while rolling, sprinkle with flour to prevent sticking.) Wrap dough tightly in plastic wrap and chill at least 8 hours but no more than 18 (after 18 hours, dough may not rise sufficiently when baked).

Roll out and cut dough:
Cut dough in half and chill 1 half, wrapped in plastic wrap. Roll out other half on a lightly floured surface, dusting with flour as necessary and stretching corners to maintain shape, into a 16- by 12-inch rectangle. Brush off excess flour with pastry brush and trim edges with a pizza wheel or sharp knife.

Arrange dough with a short side nearest you. Cut in half horizontally and chill 1 half. Cut remaining half vertically into thirds, forming 3 rectangles. Cut each rectangle diagonally in half to make 2 triangles, for a total of 6 triangles.

Shape croissants:
Holding short side (side opposite tip) of 1 triangle in one hand, stretch dough, tugging and sliding with other hand toward tip to elongate by about 50 percent.

Return to work surface with short side of triangle nearest you. Beginning with short side, roll up triangle toward tip. Croissant should overlap 3 times, with tip sticking out from underneath; you may need to stretch dough while rolling.)

Put croissant, tip side down, on a parchment-lined large baking sheet. (Curve ends inward to make a crescent shape if desired.)

Make more croissants with remaining 5 triangles, then with remaining rolled-out dough, arranging them 2 inches apart on baking sheet. Repeat rolling, cutting, and shaping procedures with chilled piece of dough.

Let croissants rise:
Slide each baking sheet into a garbage bag, propping up top of bag with inverted glasses to keep it from touching croissants, and tuck open end under baking sheet.

Let croissants rise until slightly puffy and spongy to the touch, 2 to 2‚ hours.

Bake croissants:
Adjust oven racks to upper and lower thirds of oven and preheat to 425°F.

Remove baking sheets from bags. Put croissants in oven and reduce temperature to 400°F and bake 10 minutes without opening door.

Switch position of sheets in oven and rotate sheets 180°, then reduce temperature to 375°F and bake until croissants are deep golden, about 10 minutes more.

20 Comments

Filed under Food, Life, Travel

PRETTY IN PINK

How was your long weekend?

Mine was pretty great – a lot of wine, tv and good food. We took Chumley on a little urban hike and got this great picture. He truly is the luckiest dog on the planet.

Chumley GG Bridge

I also attempted to make the elusive macaron.

untitled 7

I love have some serious love for macarons. You know the French cookie that is all soft on the inside and crisp on the outside? I have always been tempted to make these myself but how could they even come close to compare to Laduree and Piere Herme?

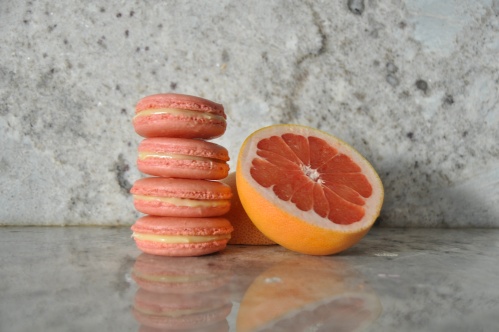
But when I stumbled upon Cannelle et Vanille’s Grapefruit versions I thought it was worth a try, especially since I love all things citrus. Plus white chocolate in the middle sounded pretty amazing.

untitled 8

untitled 4

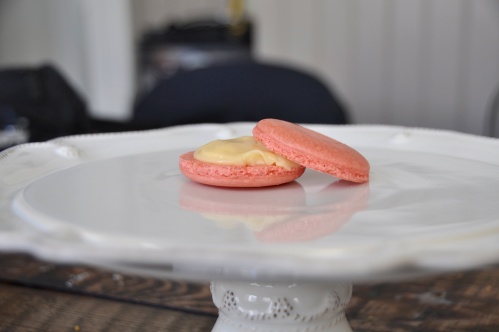
Crazy how the color changes when you cook them! Macaron close upuntitled 5

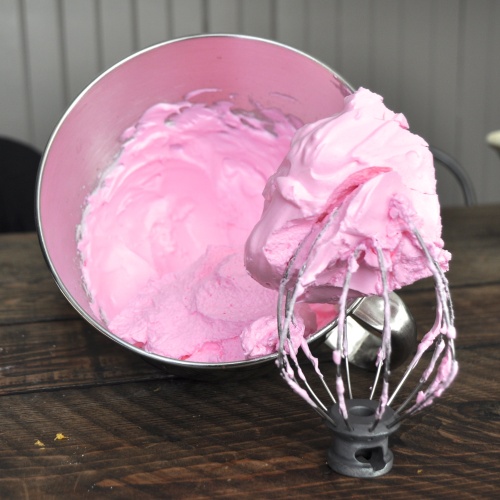
Apparently there are a couple tricks to macarons: Make sure you mix the batter just right. If you over mix it, you will have flat cookies, if you under mix it, they will crack on the top. Also, add a little more food coloring than you think as the color will fade when cooked. Make sure you tap the tray on the counter after piping them out to get rid of air bubbles and lastly, let the macarons develop a skin before putting them in the oven (this trick is weird and I am not sure if it works).

To be honest I was so nervous that these little babies would not get the all important  macaron foot (the textured part at the bottom of the cookie) , but was thrilled that they did.  I also watched a couple of these YouTubes on how to make macarons which helped, especially since the batter can be a little tricky.

My cookies are far from perfect – I made them too big and I over cooked them. But they tasted good – that is all that matters right?

Enjoy!

untitled 6

Grapefruit Macarons

Adapted from Canelle et Vanille 

180 grams almond flour
240 grams powdered sugar
140 grams egg whites, aged and at room temperature
3 grams egg white powder
2 grams fine sea salt
80 grams sugar
1 tsp grapefruit zest, finely grated
few drops of red food coloring
few drops of yellow food coloring

In a large bowl, sift together the almond flour, powdered sugar and sea salt. Set aside.

Whip the egg whites with the egg white powder until very fluffy, almost fully whipped. Start adding the sugar slowly while whipping. Add a few drops of red and yellow food coloring and continue whipping to stiff peaks.

Add the dry ingredients and the grapefruit zest to the meringue and fold with a spatula until a shiny mass forms. We want to achieve a batter that makes ribbons. You might have to test it to see if it’s done. Pipe a small amount on your sheetpan. If it keeps a little bit of a top when piped, then you have to mix it a bit further, if it spreads really fast, you have gone too far and your macarons will turn out flat. Here is a YouTube that shows when the mixing is done.

When you have the right consistency, place the mass in a pastry bag with a number 5 tip and pipe small rounds onto sheetpans lined with parchment or silpat. Sprinkle the tops with chopped pistachios. Let them dry at room temperature for at least 45 minutes to an hour. The tops must be dry when you touch them.

Have the oven preheated to 350F degrees. Place one sheetpan in the oven at a time and reduce the temperature to 300F degrees. Bake for 10 minutes and rotate sheetpan and bake for another 5 minutes.

Let the macarons cool on the sheetpan.

Grapefruit and White Chocolate Ganache

adapted from Pierre Herme’s “Macarons”

10 grams lemon juice
55 grams grapefruit juice
22 grams orange juice
25 grams lemocello
210 grams white chocolate

Melt the white chocolate over a double boiler. Make sure not to heat it too much or it will burn.

Combine the juices and lemoncello and warm them to about 110F (45C). Add the juice mixture slowly into the chocolate while whisking. Mix the ganache with an immersion blender for about 3 minutes to obtain a good emulsion. Pour onto a quarter sheetpan or square cake pan. Place plastic wrap directly on the ganache and refrigerate overnight.

Put the ganache between two of the macaron shells and enjoy!

5 Comments

Filed under Chumley, Food, Life

SCALI LOAF

For some reason, baking bread scares me. I have no idea why, maybe it is the whole yeast-rising thing. I am always afraid that I will kill the yeast or that my bread won’t rise.

DSC_0077

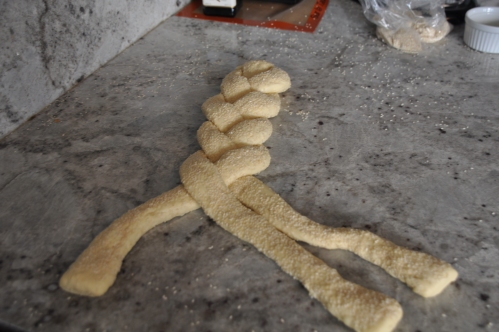
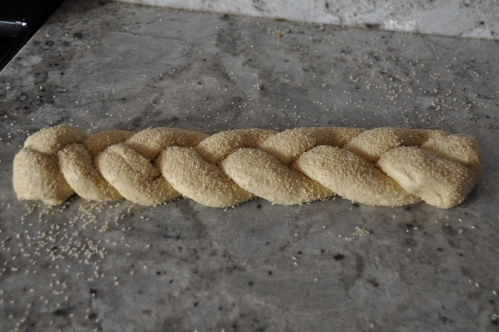
A friend recently asked my to make a Scali Loaf, the local bread in her hometown of Boston. The bread has almost a cult following in the North End of Boston. I had never had it before so it was hard to know what I was making but thankfully the bread rose and I even figured out how to braid the dough. (For the record, I did try this braid 3 times and the third time seemed to be the charm)

One of the keys to this bread is the starter – you let it sit overnight and create flavor for the bread. It gets all gooey like this:

DSC_0023


DSC_0028DSC_0031DSC_0035DSC_0043DSC_0044DSC_0046DSC_0049

DSC_0081

Now that I have conquered my first loaf, I am up for making more. King Arthur Flour surprisingly has a website with some great looking recipes. Up next maybe these pretzels or a challah?

Enjoy!

Scali Loaf

Recipe from King Arthur Flour 

starter

  • 1 cup All-Purpose Flour
  • 1/3 to 1/2 cup cool water, enough to make a stiff ball of dough
  • pinch of instant yeast

dough

  • all of the starter
  • 2 cups All-Purpose Flour
  • 1 1/4 teaspoons salt
  • 2 tablespoons Baker’s Special dry milk or nonfat dry milk
  • 2 teaspoons instant yeast
  • 2/3 cup lukewarm water
  • 2 tablespoons olive oil

topping

  • 1 large egg white beaten with 1 tablespoon cold water
  • 1/2 cup sesame seeds

To make the starter: Mix the starter ingredients together, cover, and let rest at room temperature overnight. Note: This is a dry, stiff starter. If it’s too dry to come together, add a little water to make the dough come together, and proceed with the recipe as directed.

To make the dough: Combine the starter with the remaining dough ingredients, and mix and knead — by hand, mixer, or bread machine set on the dough cycle — to make a soft, smooth dough. Place the dough in a lightly greased bowl; cover, and let it rise for about 90 minutes, till it’s just about doubled in bulk

Working on a lightly greased surface, roll each log into a rope about 22″ long. Brush each rope with the egg white/water, and sprinkle heavily with the sesame seeds, rolling the ropes gently in the seeds to pick up as many as possible. Grab one end of each rope, and squeeze the ends together firmly. Braid the ropes, tucking the ends under to make a neat braided loaf.  Cover the loaf  with lightly greased plastic wrap, and allow to rise till very puffy, about 90 minutes.

Towards the end of the rising time, preheat the oven to 425°F.

Bake the loaf for about 25 to 35 minutes, till it’s a deep golden brown. The rolls will need to bake for about 25 minutes. Remove from the oven, and cool on a rack

5 Comments

Filed under Food

SCALAMANDRE’S ZEBRAS…LOVE AT FIRST SIGHT

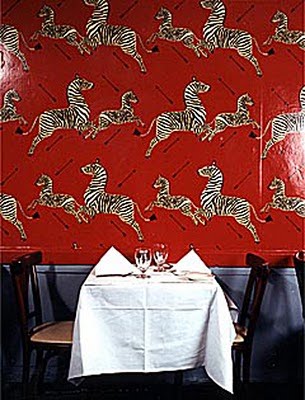
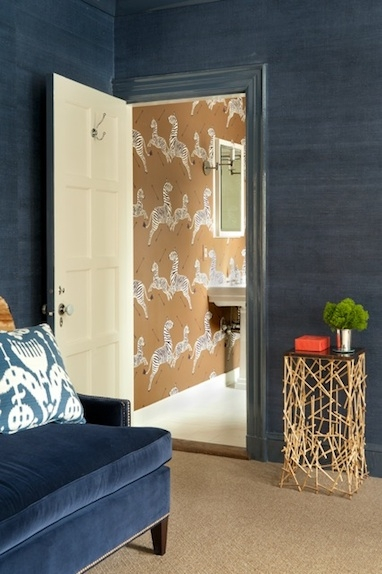
Right after college I moved to NYC.  About a year into living there, I had lunch at Gino’s on the Upper East Side. This was an old-school NYC institution that had been around since 1945.  The food was completely forgettable but to this day I still cannot forget the Scalamandré wallpaper that covered the restaurant’s walls. I was in shock and awe that someone would wallpaper an entire restaurant with red zebras. An entire restaurant full of zebras. I loved it.  The story behind the wallpaper is that the restaurant’s owner  Gino Circiello, liked to hunt but he couldn’t afford to pay for an African safari.  So instead of going hunting he decided that he could afford to put zebras on the walls of his restaurant   He commissioned his friend Franco Scalamandré to design wallpaper with leaping zebras pursued by arrows. And so it began   Sadly the restaurant shut its doors in 2010 but the wallpaper still lives on through Scalamandré.

scalamandre2

Ginos Restaurant Zebra wallpaper

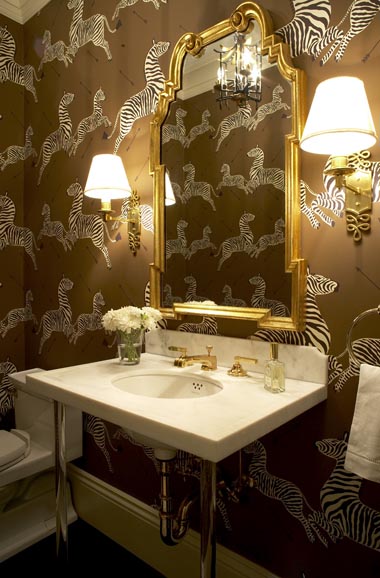
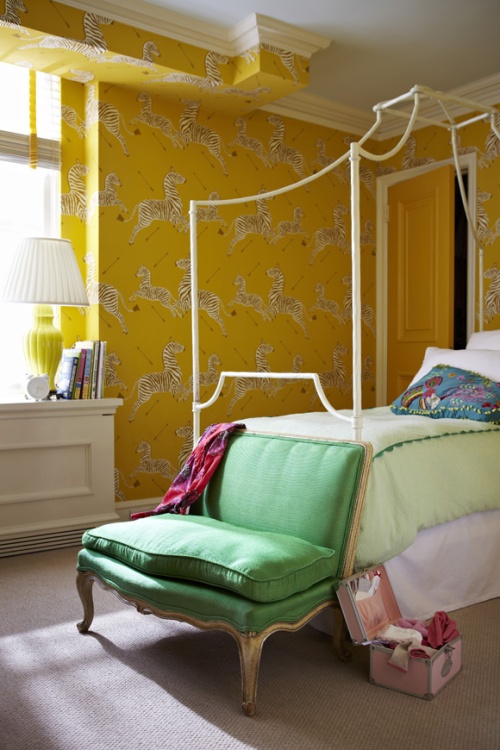
One day, if Luke and I ever get the chance to own our own home, I am determined to use wallpaper somewhere -either  a bathroom, library, guest room or dinning room. What do you think?

scalamandre

powder room kips bay show house 2012 habituallychic 001

The wallpaper even made it into The Royal Tenenbaums

royal_tenenbaums

The wallpaper comes in different colors, like this black which I love!

black scalamandre

navy scalamandre

Massuco-Warner-Miller-Scalamandre-Zebra-WallpaperGoodBones_p53

3 Comments

Filed under Design, Life

VALENTINE’S DAY COOKIES

Happy Valentines’s Day everyone.

DSC_0148

DSC_0086

Luke and I have no real plans. To be honest, I am not one of the biggest fans of Valentine’s Day …so I think we will get take out and catch up on Downtown Abbey.

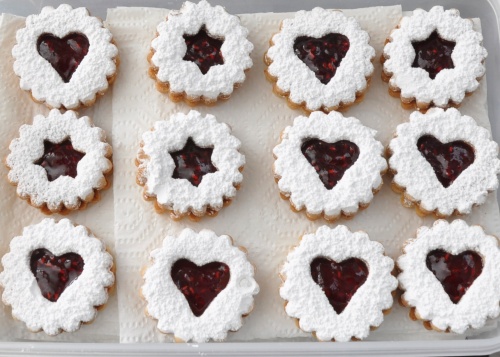
I made these cookies for a friend recently and thought they were the perfect V-Day cookies – crisp butter shortbread cookies filled with red raspberry jam. BUT if you don’t celebrate Valentine’s Day and still want to make these cookies, then just use another cookie cutter.

DSC_0056

DSC_0058

DSC_0065

DSC_0064

DSC_0066

DSC_0069**A couple tricks to these cookies; make sure the dough is warm enough to role out, but cool enough to make crisp cutouts, match the top and bottom of the cookies together before putting the filling in and put powdered sugar on the top cookie before sandwiching the cookies together.

Enjoy!

Linzer Cookies

Adapted from Gourmet

  • 2/3 cup almonds  * The recipe called for hazelnuts, but I choose to use almonds. Either will work.
  • 1/2 cup packed light brown sugar
  • 2 1/2 cups all-purpose flour
  • 1/2 teaspoon baking powder
  • 1/2 teaspoon salt
  • 1/4 teaspoon cinnamon
  • 2 sticks (1 cup) unsalted butter, softened
  • 1 large egg
  • 1 teaspoon vanilla
  • 1 12-oz jar raspberry jam

Toast almonds in a shallow baking pan until fragrant, then cool to room temperature.

Pulse nuts and 1/4 cup brown sugar in a food processor until nuts are finely ground.

Whisk together flour, baking powder, salt, and cinnamon in a small bowl.

Beat together butter and remaining 1/4 cup brown sugar in a large bowl with an electric mixer at medium-high speed until pale and fluffy, about 3 minutes in a stand mixer (preferably fitted with paddle) or 6 minutes with a handheld. Add nut mixture and beat until combined well, about 1 minute. Beat in egg and vanilla. Reduce speed to low and add flour mixture, mixing until just combined.

With floured hands, form dough into 2 balls and flatten each into a 5-inch disk. Chill disks, wrapped in plastic wrap, until firm, at least 2 hours.

Put oven rack in middle position and preheat oven to 350°F.

Roll out 1 disk of dough into an 11-inch round (1/8 inch thick) between 2 sheets of wax paper (keep remaining dough chilled). If dough becomes too soft to roll out, rewrap in plastic and chill until firm. Cut out as many cookies as possible from dough with larger cookie cutter and transfer to 2 ungreased large baking sheets, arranging about 1 inch apart. Using smaller cutters, cut out centers from half of the cookies, reserving centers and rerolling along with scraps (reroll only once). Bake cookies, switching position of sheets halfway through baking, until edges are golden, 10 to 15 minutes total, then transfer with a metal spatula to racks to cool completely. Make more cookies from second disk.

Spread about 1 teaspoon jam on flat side of 1 solid cookie and sandwich jam with flat side of 1 windowed cookie. Sandwich remaining cookies in same manner.

Cookies keep, layered between sheets of wax paper or parchment, chilled in an airtight container 2 weeks.

3 Comments

Filed under Food

PALM SPRINGS (part two)

Palm Springs (cont’d)

On Saturday Luke didn’t have to work, so we woke up and decided it was time to meet our first Joshua Tree.

Palm Springs 6

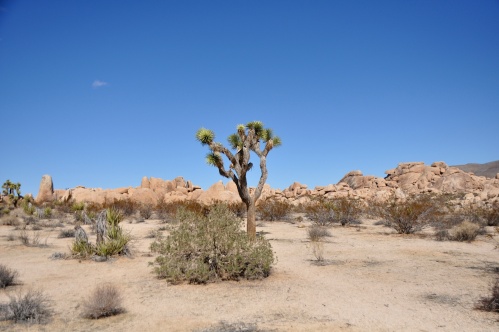
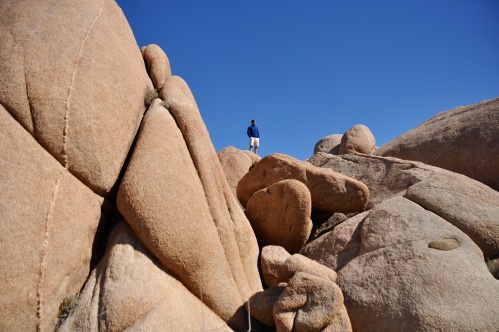
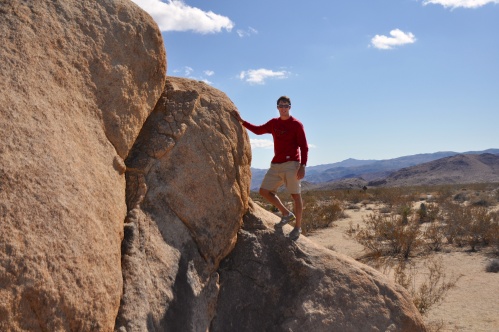
Joshua Tree National Park is located  almost directly east of Palm Springs. Since we were staying south of Palm Springs we entered the park through the southwest entrance. Not sure what we were thinking but we were the most ill-prepared of park- goers. We had no water or food when we got to the park and neither of those are sold inside the park. BUT it still was amazing. Here are our pictures. The park is totally psychedelic/Dr. Seuss land but really cool to see in person.

Palm Springs 15

Spotted… our first official Joshua Tree.

Palm Springs 9

Luke, the mountain man

Palm Springs 14 Palm Springs 11

My attempt at an “artsy” picture. Not sure it works.

Palm Springs 16Palm Springs 17

We stumbled upon this cactus garden in the middle of the park. I am weirdly obsessed with the inside of a cactus – I don’t know why, but the pattern and texture is so cool. I know, I am a dork.

Palm Springs 7

Palm Springs 8

After Joshua Tree we had lunch at Cheekys which was delicious and needed after no food or water during our Joshua Tree trip. Definitely recommend – it serves solid “California” fare that is local/sustainable and all that good stuff. But, be warned that the wait gets LONG. So don’t go hungry. We did and the 20 minute wait felt like 2 hours.

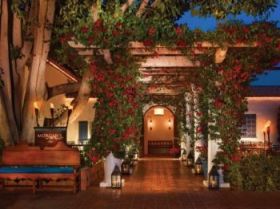
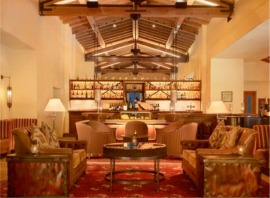
That night we had dinner reservations at Jake’s, Copley s and Spencer’s (I like to be prepared) but since the resort we were staying at was about 30 minutes from those restaurants and I was ready to tear into some red wine,  we decided to eat at Morgan’s in the Desert, one of the resort’s restaurant. If you ever want a well cooked steak and happen to be in Palm Springs, this is the spot for you. The restaurant was beautiful inside and out.

La-Quinta-Morgans-Entrance1  dining-1

Halfway through  dinner and a bottle of this, one of the waiters opened a door we were seated next to, too quickly and the force from the door shattered a light bulb over Luke’s head. Yeah, that really happened in the middle of dinner.  Glass everywhere. BUT… this proved totally worth it since the restaurant felt so bad about shattering a light bulb over Luke’s head that they bought us dinner! (oh yeah and Luke was fine too).  Looking back I should have gone for the most expensive wine….

Sunday we woke up early and started the drive back to San Francisco. Instead of taking the fastest route, we decided to take the scenic route up the 101. We stopped for lunch in Los Olivos which is an incredible wine enclave in the middle of the Santa Ynez Valley.

We weren’t planning on wine tasting really, especially since we were walking around with Chumley and had a 4 hour car ride ahead of us, but we stumbled upon Alta Maria.  Amazingly Chumley was welcomed with open arms into the tasting room (which was a first) and we did a tasting of their amazing wine. Here he is, what a wino.

Chumley at winery

We ended up buying two bottles of their Cabernet because it was fantastic. After I had a sufficient wine buzz (Luke was driving us home) we wandered over to Paninos for a late lunch.

I highly recommend checking out Los Olivos if you are ever looking for a new wine spot to try. There is only 1 hotel in Los Olivos, but it is so close to Santa Barbara that it could be a great day trip.

Made it home to San Francisco, exhausted but had a great weekend. Can’t wait to do it all over again one day.

If you are looking to take a trip to Palm Springs or just in a wanderlust mood, here is my guide to Palm Springs, Los Olivos and  some of the resources I used when planning:

Palm Springs 

Stay: 

La Quinta – I thought La Quinta was a great resort. Like I mentioned before, the rooms are  a little dated, but the grounds are amazing. This would be a great spot for a girls weekend or a romantic getaway where you just wanted to lounge around.

Parker – if we were to go back and had an unlimited budget, this is where I would stay.

Eat:

Cheeky’s – Like I mentioned before, the wait gets long, but it was worth it.

Jake’s – I had lunch here and it was wonderful. They serve lunch and dinner and seems like a mellow place to grab some good, solid food.

Spencer’s – Didn’t eat here but the menu looks amazing.

Copley’s – I wanted to try this place not only because it got good reviews, but mostly because it was Cary Grant’s old house that they turned into a restaurant. Old-school Hollywood glamour.

Morgan’s in the Dessert – Go for the steak. The rest was pretty good. If you do go, watch out for falling light bulbs.

Shop: (Palm Springs and surrounding area have many amazing stores, these are ones that I wanted to try)

Retrospect

Dazzles – Bakelite heaven

Angel View Thrift Stores

The Estate Sale

Also – Design Sponge has a great guide to Palm Springs and is more in-depth on where to eat/stay/drink/play.

Los Olivos:

Eat

Panino – sit outside in the sun and enjoy a relaxing lunch

Side Hardware and Shoes: heard that this is a great spot, I love the weird name. We didn’t make it there but will do so next time.

Drink:

Alta Maria is the only place we stopped (and we loved it). But there are dozens of wineries in this area, so you can’t go wrong.

If you want any more information on my experiences in Palm Springs or Los Olivos, please contact  me, I would love to help.

2 Comments

Filed under Chumley, Food, Life, Travel, Wanderlust

PALM SPRINGS (part one)

I am back and the road trip was a success!

I made it down to Palm Springs late Thursday night. The drive from San Francisco took about 7 hours but was not too bad. Plus, my co-captain was Chumley so he kept me company…sort of.

We stayed at the La Quinta Resort which is about 20 miles outside of Palm Springs. The resort was beautiful – amazing grounds with old – school hacienda style rooms. The actual rooms themselves were a little dated, but nothing too bad. The best part of the resort were definitely the expansive grounds, as well as how dog friendly it was- they even gave Chumley his own bed and dog bowls.

OLYMPUS DIGITAL CAMERABOLYMPUS DIGITAL CAMERAOLYMPUS DIGITAL CAMERA

On Friday morning I had grand plans to go on a self-guided architectural tour of Palm Springs. But as soon as I got to the first stop on my tour, it started raining. I thought it didn’t rain in the desert! So I only got one picture in. The Tramway Gas Station, designed by Albert Frey. It really is a cool building and it now houses the Palm Springs Welcome Center. I love the crazy line of  the roof.

Palm Springs 3

Since I didn’t really pay homage to any other mid-century design meccas – here is what I wanted to see:

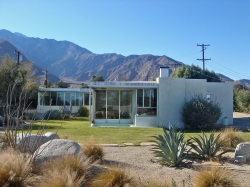
KaufmanHouseAlexanderHouseTwinPalmsMiller_House,_Palm_Springs,_CaliforniaEdris House - E Stewart Williams 7041294615_88e172838b

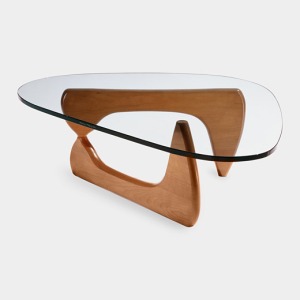
With the rain ending my self guided tour, I decided the next best thing was to go shopping. My first stop was Retrospect. A very well curated store that was sadly out of my budget. They did have a version of this table which I loved, but was seriously way over what I could spend.

41581_A2_Walnut_Base_Noguchi_Coffee_Tablesweedishhome4

After Retrospect, I stopped in at Dazzles and fell in love. Every ounce of the store is filled with vintage goodness. It is not the most organized store – but the owner Mike, helps you dig through. It was at Dazzles that I was introduced to Bakelite. Have you ever heard of it? Here is some more info but it was basically the first ever plastic created in the early 20th Century and it was used for all sorts of things, including jewelry. They stopped making it after WWII but it has a pretty big cult following today in the world of vintage jewelry.

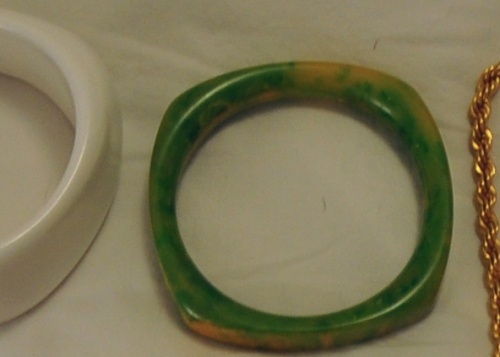
So I decided I needed my first piece of Bakelite. I purchased a neon green bangle that has this fantastic neon yellow patina. Here is a pic, although not a very good one:

Palm Springs 22

If you are interested in getting your own Bakelite check out Etsy or ebay. But I did learn that it is hard to tell if the piece is Bakelite so here are some ways to tell if it is real.  I also feel in love with vintage costume jewelry. For some reason it spoke to me so this might be my new vice. I was on a role with bangles and earings. Here is the loot (sorry again for the bad pic)

Palm Springs 21

Couldn’t fit the whole weekend in one post, so tune in tomorrow for the report on the rest of the weekend…

4 Comments

Filed under Chumley, Design, Travel, Wanderlust

MANTRAS

Mantras2

I know, I know, posting something about mantras is pretty hippie-dippy of me right? But bare with me.

I feel some change in the works in my life – all of which is great – but I can feel it coming and I know it is out there. I have been searching for some aspects of my life  to change and it seems like I am headed in the right direction.

I was speaking with a friend recently and she reminded me that sometimes we don’t feel worthy. Which is exactly how I feel sometimes – you know like you have made it this far in life and are not sure how or when you are going to get caught?  After our conversation she sent some mantras that really resonated with me. Feel free to ignore or stop reading, but I feel like there are a couple of you who might like these:

  • Action conquers fear.
  • Be bold.
  • Fortune favors the brave.
  • I will be led by my dreams.
  • I will be fueled by passion.

My favorite is #3  – Fortune favors the brave. I love it and need to remind myself of this idea – that nothing good is going to happen unless you have the heart to take that chance.

Also – she sent this Ted talk – it is about 20 minutes but really poignant and entertaining.

Over and out from Amanda, the hippie.

5 Comments

Filed under Life

A SAD SUPERBOWL

Luke is the #1 49er fan ever – like really, ever. So obviously he was really bummed about yesterday.  I think the whole city was. 2014 will be their year.

When I first started dating Luke he had season tickets to the 49ers. I know what you are thinking, pretty fancy right? No. This was when the 49ers were bad, I mean really bad. We would go to each and every home game – and watch from kickoff to the absolute second of the game – even when they were loosing, badly.

P7270020

Since we were living in San Francisco and we didn’t want to drive to the game, we would take the bus. Which was great, responsible, and really easy, unless you wanted to tailgate. But that didn’t stop us. Instead we would bring a case of beer on the bus and when we got to the stadium we would find a random car in the parking lot and have our own tailgate – classy right? (See below… that is some random person’s white SUV)

luke retouched

Thankfully those days are long gone, mostly because Luke gave up his tickets and also I think I may be too old to be drinking beer in the middle of the day behind a random car.  Maybe.

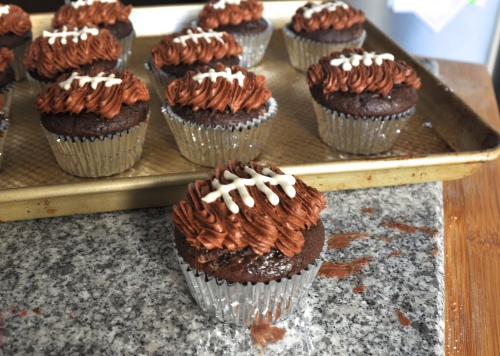
It was big news in our apartment that the 49ers were in yesterday’s Superbowl.  So in honor of the most sacred day in football I made my Gameday Chili and these double dark chocolate cupcakes.

DSC_0160

DSC_0161

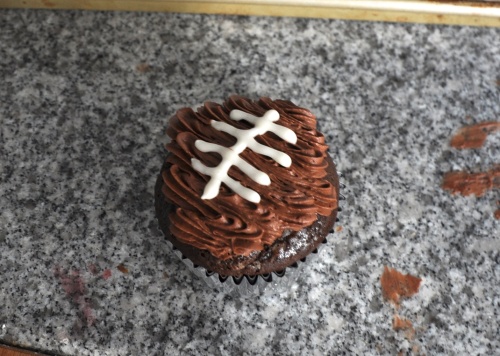
I was going to do 49er logos on all the cupcakes, but I got lazy and decided a football was easier and probably tastier (in case you can’t tell the frosting is supposed to look like a football) . However judging by the white lines on the football, laziness took over regardless. BUT they still tasted good.

The recipe comes from this new cookbook that I love and I stole copied the frosting idea from Pinterest.  Be warned, the cupcake recipe calls for mayonnaise. Don’t be afraid. Trust me – mayonnaise is great for cupcakes – it is essentially eggs, oil and a little acid. I know it is weird but don’t over think it.

Enjoy!

Double Dark Chocolate Mayonnaise Cupcakes

Adapted from the Baked Cookbook

Cupcake:

  • 2 ounces bittersweet chocolate (do not exceed 61% cacao), chopped
  • 2/3 cup unsweetened cocoa powder
  • 1 3/4 cups boiling water
  • 2 3/4 cups all purpose flour
  • 1 1/4 teaspoons baking soda
  • 1/4 teaspoon baking powder
  • 1 cup sugar
  • 1 cup (packed) dark brown sugar
  • 1 1/3 cups mayonnaise (do not use reduced-fat or fat-free)
  • 2 large eggs
  • 1 teaspoon vanilla extract

Frosting:

  • 10 ounces bittersweet chocolate (do not exceed 61% cacao), chopped
  • 1 1/2 cups (3 sticks) unsalted butter, room temperature
  • 3 cups powdered sugar
  • 1 tablespoon vanilla extract

For cupcakes:
Preheat oven to 350°F. Insert cupcake liners into cupcake tin.

Combine chopped chocolate and cocoa powder in medium metal bowl. Add 1 3/4 cups boiling water and whisk until chocolate is melted and mixture is smooth.

Sift flour, baking soda, and baking powder into another medium bowl.

Using electric mixer, beat both sugars and mayonnaise in large bowl until well blended, 2 to 3 minutes. Add eggs 1 at a time, beating until well blended after each addition. Beat in vanilla. Add flour mixture in 4 additions alternately with chocolate mixture in 3 additions, beating until blended after each addition and occasionally scraping down sides of bowl. Spoon batter into cupcake tin. Batter should fill the tin about 3/4 full.

Bake cakes until tester inserted into center comes out clean, 17 to 20 minutes. Cool cupcakes in pans for about 10 minutes then transfer to racks. Cool completely.

For frosting:
Place chopped chocolate in medium metal bowl; set bowl over saucepan of simmering water and stir until chocolate is melted and smooth. Carefully remove bowl from over water; let melted chocolate cool until lukewarm, stirring occasionally.

Using electric mixer, beat butter in large bowl until smooth and creamy. Sift powdered sugar over butter and beat until well blended, about 2 minutes. Beat in vanilla. Add melted chocolate and beat until well blended and smooth, occasionally scraping down sides of bowl.

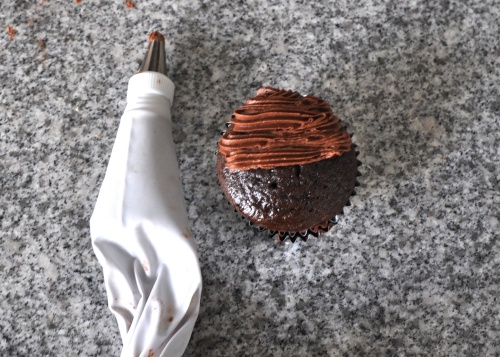
With a piping bag fitted with a star tip, ice the cupcake in the shape of a football – start small at one end and work bigger to the middle then go smaller as you reach the otherside. (I know that is confusing but not sure how to describe it…here is a picture)

DSC_0156

After piping the chocolate frosting, combine 1/2 cup of powdered sugar with a little milk/cream and pipe the football lines onto the cupcake.

** I only made 1/2 of the recipe and it was easy to cut in half.

Leave a comment

Filed under Food, Life

FIVE YEARS….

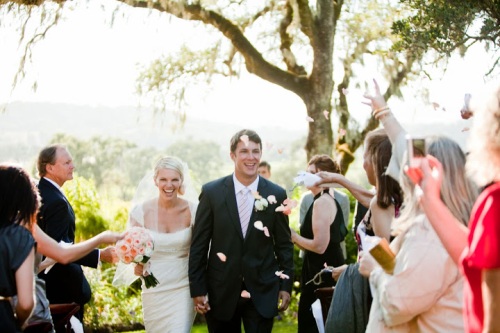
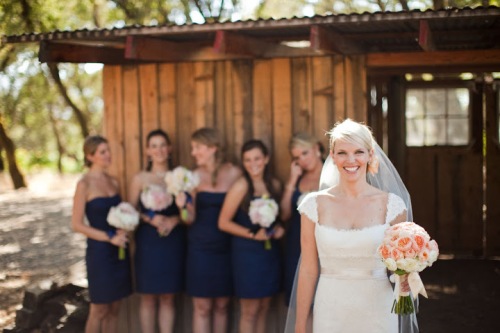
Happy anniversary to my handsome husband. We met 5 years ago today at a friend’s Superbowl Party. Our initial meeting was something out of the kindergarten sand box. We said hello, he made fun of me and then he ran away – it was love at first sight.

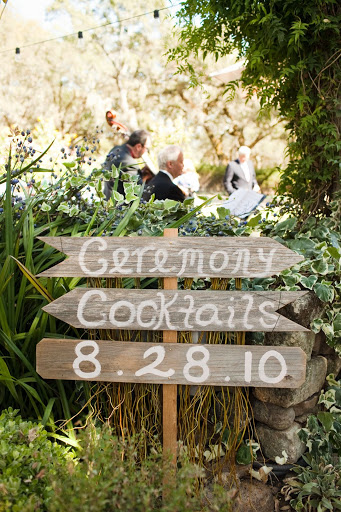
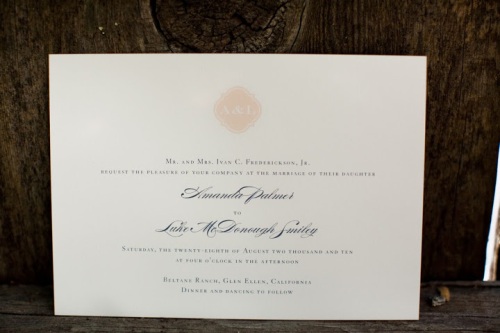
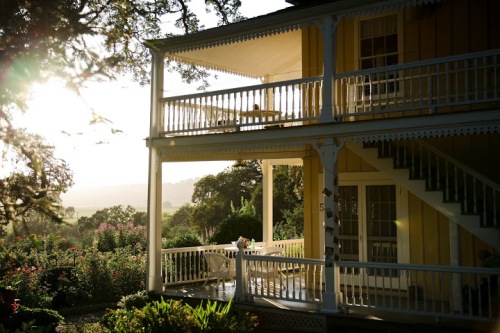
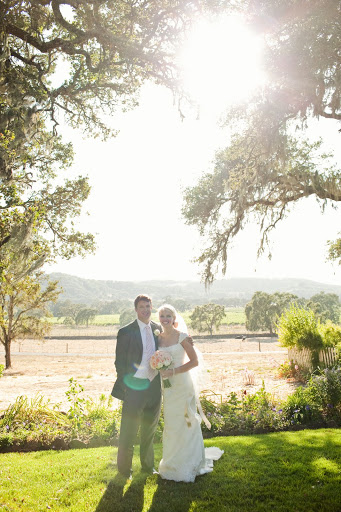
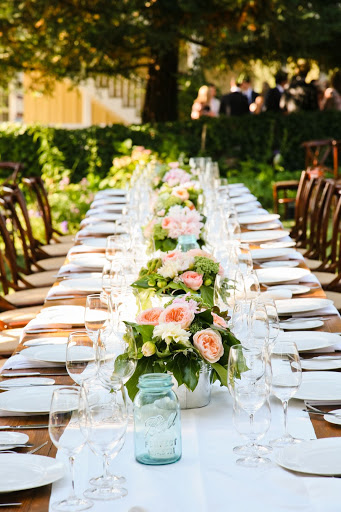
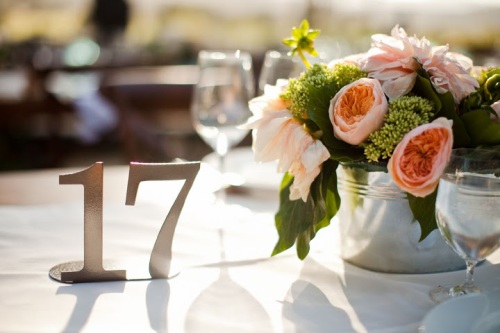
We got married 2 1/2 years ago – one of the best days ever – at the beautiful Beltane Ranch in Glenn Ellen, CA.

Luke, thanks for loving me and all my craziness.

IMG_3678

(* Photo credit below)

IMG_0168 IMG_2557

IMG_3083-2

IMG_3176 IMG_0547 IMG_0361

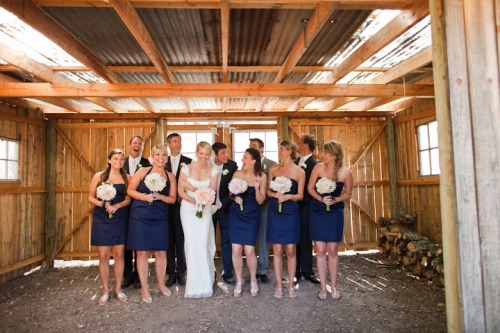
**Below is one of my favorite pictures – a bat flew into the barn when we were taking pictures. Our reaction is priceless.

IMG_9940

IMG_9942IMG_2628-2 IMG_0477 IMG_3268A IMG_0082 IMG_3954 IMG_3483-2 IMG_4038 IMG_3899

We had the best time and the greatest vendors ever. Here is a list if you ever find yourself planning a wine country wedding:

Location: Beltane Ranch

Food: Elaine Bell Catering

Flowers: SF Florist

Photographer: Kate Harrison Photography (**All photos above are Kate Harrison -can’t recommend her highly enough, she is amazing!)

Make-up: Chris McDonald 

Event Planner: A Divine Occasion

Also for your reading pleasure a post on our wedding and engagement pics.

1 Comment

Filed under Design, Life

CARTAGENA

Oh Cartagena….I wish I was there right now.

DSC_0092

I grew up in South Florida in the 80s and 90s and back then Colombia was this place that no one had every been to and no one ever planned on going to. But, fast forward 20 years and Luke and I were looking for a place to travel to over the holidays. Our original plan was Argentina – think wine, food and more wine. But coincidentally as we were about to book our flight to Argentina, a friend called and raved about Cartagena. Long story short – it sounded amazing – think rum drinks, the beach and more rum drink.  So we decided to go for it.

DSC_0113

We were visiting my family in Florida for the first part of the holidays so we flew from Miami straight into Cartagena – who knew that Colombia is only about 2 1/2 hours from Miami?!?!  The flight was super easy (not going to lie, I was a little nervous about flying Air Avianca but it proved to be nicer than most US based airlines). The airport is about 7 minutes from Cartagena and the place to stay in Cartagena is in the historic walled city. The goal of the vacation was to relax, soak in the sights and eat great food – as soon as we entered the walled city, I knew we made the right decision in Cartagena.

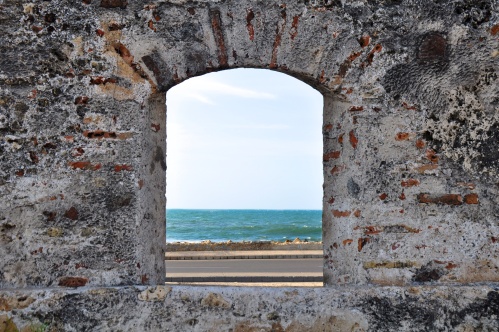
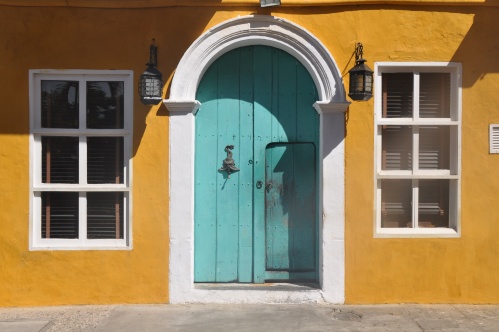
Cartagena is a vibrant, walkable, warm city that sits on Colombia’s northwest coast on the Caribbean Sea. Dating back to the early colonial time, Cartagena has seen itself its fair share of colonialists, slaves and privates. Check out this site for more history. What is left is a fortified walled city that looks like you are back in the colonial times. The architecture is vibrant and colorful – think Bahamas meets Spanish colonial.

We spent the first 3 nights of our vacation at the boutique hotel connected to the Sofietl –  Bovedas de Santa Clara – and loved it. It was a smaller hotel that the Sofitel but we were able to use the amenities of the Sofitel.  I am pretty picky about where we stay when we travel (i.e. hours of online researching)  and Bovedas de Santa Clara passed test. We even got upgraded to a two story suite.

The first couple of days of our vacation was spent wandering around the walled city and soaking in Cartagena. I must say that everyone was so  friendly and warm and the food was incredible. Think lots of fresh fruit, plantains and ceviche.

DSC_0068DSC_0069

We ate at some great restuarants, namely Salou and La Cocina de Pepina and wandered around the city. We even went scuba diving!

DSC_0282
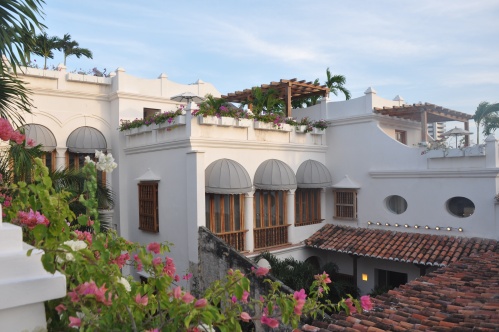
We were later joined by Luke’s friends and we moved hotels. Our next hotel was Casa San Agustin – which was simply amazing. If we had a house, this is what I would want it to look like. A great mix of old and new.

DSC_0375 DSC_0381

I know what everyone is thinking – is Colombia safe? Given it past reputation, I had the same reaction, but from our experiences it was safe. We were in a very touristy part of the country but even some touristy places can be unsafe. I never once felt uncomfortable, espcially since I don’t exactly fit in with my blond hair down there. Full disclosure, as a woman you do get a little more attention but nothing aggressive.

DSC_0334

DSC_0106

DSC_0247

DSC_0080

DSC_0190

We loved our time in Cartagena and if you are looking to travel to a new place -definitely check this out. Here are some recommendations for your stay:

Hotels

Bovedas de Santa Clara

Casa San Agustin

Restaurants/Food

Alma– definitely a must try. I am still dreaming about the lobster empanadas and the pasta with shrimp and lobster.

Salou – make sure you try their ceviche (crema ceviche to be exact).

La Cocina de Pepina – this restaurant is outside of the walled city in a neighborhood called Getsemani. It is walkable from the walled city

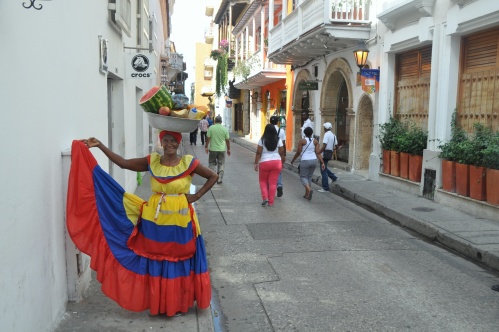
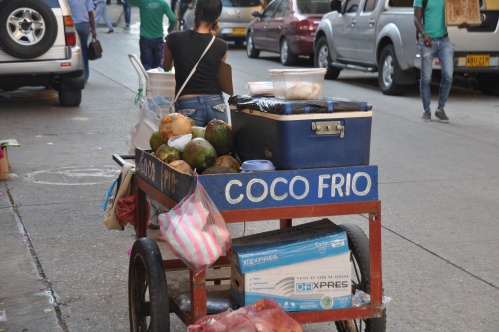
Also, try the street vendors. Particularly fruit from these ladies: the Palenquera. I am sure the fruit costs more, but it is much more festive.

Things to do:

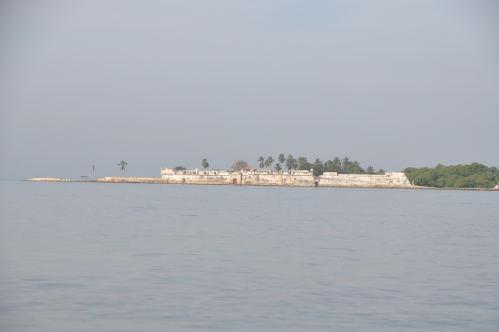
Rosario Islands – we charted a boat and took it out to the Rosario Islands. It was beautiful and a great way to escape the heat of the walled city

Wander – The walled city is amazing. It is small enough to walk and definitely safe. Best advice – wander the streets and admire the colors, the food and the people.

Sunset Cocktails on top of the wall – We tried Cafe Del Mar one night. The scenery was beautiful but the service and drinks were nothing to write home about. Instead save some cash and buy drinks either from one of the beer vendors roaming around or grab a “to go” cocktail and head to the wall at sunset.

Enjoy Cartagena -if you want anymore information on when to go/where to stay etc., please contact me.

Leave a comment

Filed under Design, Travel, Wanderlust

THE PERFECT CHOCOLATE CHIP COOKIE

DSC_1719 (1)

I somehow stumbled upon this recipe in the NY Times. It was claiming to know how to make the perfect chocolate chip cookie – you know the kind that is crispy on the outside and all ooey-goey in the middle? Naturally I had to try it. The article says the trick to a perfect chocolate chip cookie is… to let the dough rest 24 to 72 hours. I am not sure who can make chocolate chip cookie batter and just let it hang out in your fridge without eating it? But I decided to try it.

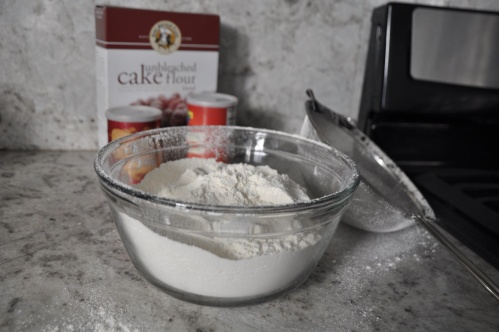
The batter is pretty traditional, except for the use of bread flour and cake flour instead of all purpose flour.

DSC_1552 (1)

DSC_1558

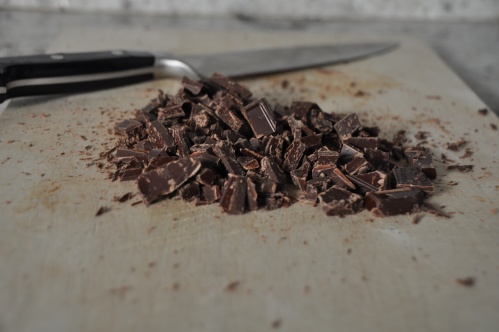
Didn’t have chocolate chips so I used a bar of semi-sweet I had on hand. Next time I make these cookies, I will add more chocolate.

DSC_1559

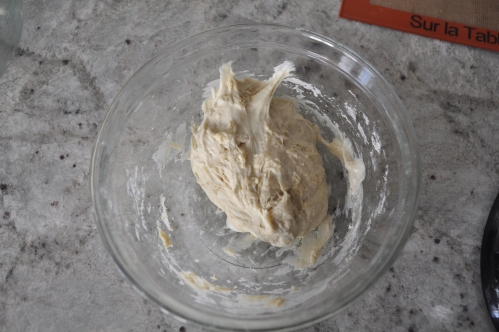
Here is the “secret step” – after you make the dough, put some plastic wrap on top and throw it in the fridge for at least 24 hours. (Not going to lie, I had my hand in that dough a couple times during the 24 hours. )

DSC_1561

After 24 hours  – pull them out and shape them into golf balls. Make them big, the cookies don’t spread out too much. Also throw some sea salt on top.

DSC_1712

Voila!

DSC_1717

I baked the first batch at 24 hours and they were great cookies. Luke, my official tester loved them. However Luke loves any cookie that he can get his hands on. I then tried again at 48 hours and the official review was that the 48 hour cookies were better than the 24 hour.

Who knows – I thought they both tasted great and I ate about 1/2 dozen of them. Regardless of whether you wait 24, 48 or 72 hours, I did find out that it is pretty nice to have cookie dough just hanging out in the fridge to throw in the oven when you need a warm cookie, or to just nibble on raw.
Here is the recipe.

Enjoy!

The Perfect Chocolate Chip Cookie

Adapted from NY Times and Jacques Torress 

  • 2 cups minus 2 tablespoons (8 1/2 ounces) cake flour
  • 1 2/3 cups (8 1/2 ounces) bread flour
  • 1 1/4 teaspoons baking soda
  • 1 1/2 teaspoons baking powder
  • 1 1/2 teaspoons coarse salt
  • 2 1/2 sticks (1 1/4 cups) unsalted butter
  • 1 1/4 cups (10 ounces) light brown sugar
  • 1 cup plus 2 tablespoons (8 ounces) granulated sugar
  • 2 large eggs
  • 2 teaspoons natural vanilla extract
  • 1 1/4 pounds bittersweet chocolate disks or fèves, at least 60 percent cacao content
  • Sea salt.

Sift flours, baking soda, baking powder and salt into a bowl. Set aside.

Using a mixer fitted with paddle attachment, cream butter and sugars together until very light, about 5 minutes. Add eggs, one at a time, mixing well after each addition. Stir in the vanilla. Reduce speed to low, add dry ingredients and mix until just combined, 5 to 10 seconds. Drop chocolate pieces in and incorporate them without breaking them. Press plastic wrap against dough and refrigerate for 24 to 36 hours. Dough may be used in batches, and can be refrigerated for up to 72 hours.

When ready to bake, preheat oven to 350 degrees. Line a baking sheet with parchment paper or a nonstick baking mat. Set aside.

Scoop 6 3 1/2-ounce mounds of dough (the size of generous golf balls) onto baking sheet, making sure to turn horizontally any chocolate pieces that are poking up; it will make for a more attractive cookie. Sprinkle lightly with sea salt and bake until golden brown but still soft, 18 to 20 minutes. Transfer sheet to a wire rack for 10 minutes, then slip cookies onto another rack to cool a bit more. Repeat with remaining dough, or reserve dough, refrigerated, for baking remaining batches the next day.

Eat warm, with a big napkin.

DSC_1721

Leave a comment

Filed under Food

KITCHEN CABINET GRANOLA

DSC_1726DSC_1733

In an attempt to clean out my kitchen cabinets, I noticed that I had bags and bags of nuts and dried fruit left over from Thanksgiving and Christmas. Instead of leaving them there until the 2013 holidays (which I thought about doing) I decided to make some granola. Luke loves granola – especially when we go out for brunch. It is weird – I order pancakes/waffles/omelets – basically anything that I am too tired to make myself in the morning, and Luke always orders granola.

Also, granola is expensive at the grocery store!! -so I thought this could be a morning treat for him, while also saving some cashola.

DSC_1746

In my cabinets, I found almonds, pecans, hazelnuts, dried figs, dried cranberries and rolled oats. With the addition of apricots and coconut I bought at the store – voila I had granola!

Here is the recipe – it can be changed anyway that you want as long as you have some oats, nuts, fruit and butter/oil to keep it together.

Enjoy!

Adapted from Gourmet, February 1999

  • 3 cups old-fashioned rolled oats
  • 1/3 cup sliced almonds
  • 1/3 cup roasted and chopped hazelnuts
  • 1/3 cup roasted and chopped pecans
  • 1/2 cup unsweetened coconut
  • 1/2 teaspoon salt
  • 1/2 stick (1/4 cup) unsalted butter
  • 6 tablespoons honey
  • 1/4 cup brown sugar
  • 1/2 tsp cinnamon
  • 1/2 tsp vanilla
  • 1 cup mixed dried fruits such as cranberries, apricots and figs

Preheat oven to 325°F.

In a large bowl stir together oats, nuts, coconut, and salt. In a small saucepan melt butter with honey, brown sugar, cinnamon and vanila over low heat, stirring. Pour butter mixture over oat mixture and stir until combined well.

In a large jelly-roll pan spread granola evenly and bake in middle of oven, stirring halfway through baking, until golden brown, about 15 minutes. Cool granola in pan on a rack and stir in dried fruits. Granola can be kept in an airtight container at cool room temperature 2 weeks.

Leave a comment

Filed under Food

Weekend Tripping

My wanderlust continues.

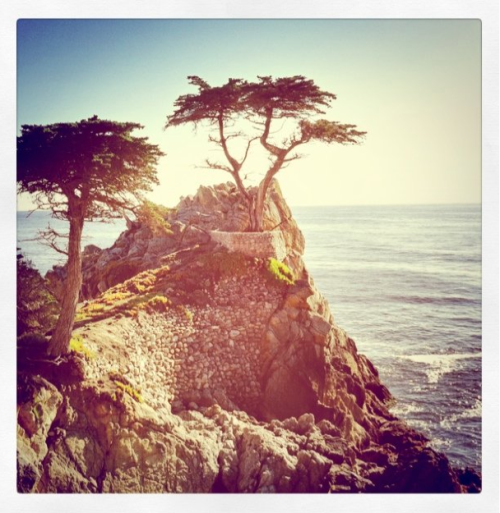
Carmel_Big Sur

{via}

Yesterday’s post was more about far off distant lands – so I thought today, I would post about a weekend trip that I have been thinking about taking to Carmel and Big Sur.(If you can’t tell, I live for weekend trips and adventures. Luckily I live in a city that has so many weekend trips in driving distance.)

For those that don’t know Big Sur and Carmel are about two hours south of San Francisco and are totally magical. I have done this trip a couple times, but I promise, it never gets old. Located on the historic Route 1, both Carmel and Big Sur offer amazing views, good food, shopping, hiking – the list could go on. Carmel reminds me of one of those Thomas Kincaide paintings and Big Sur is rugged, raw and beautiful. Best part is – they are only 45 minutes from each other.

So, here is my theoretical itinerary for my unplanned trip. Road trip anyone?

Friday

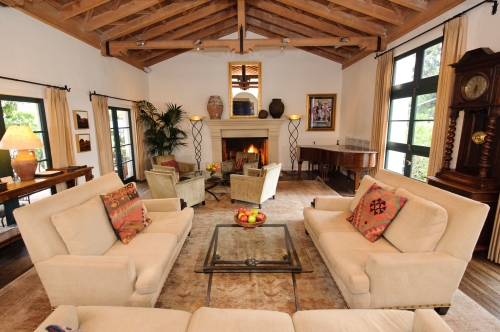
Drive down after work and check into the Cypress Inn.

CypressInn_Carmel

The Cypress Inn is one of the original boutique hotels in Carmel and is co-owned by the legendary actress Doris Duke. The Cypress Inn and Carmel are really dog friendly and we all know that I am a crazy dog owner, so Chumley’s attendance on this trip is mandatory.

After checking in and having a drink, wander out for dinner.

Photo: Michael Troutman/www.dmtimaging.com

Here are a couple good option for dinner in Carmel:

La Bicyclette

Casanova

Forge in the Forest

Saturday 

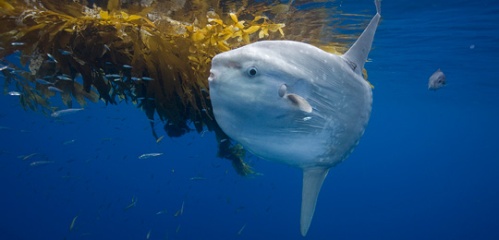
Saturday morning grab a coffee and head down to Carmel City Beach Park. Best way to ease into the day is staring at the Pacific Ocean. Grab breakfast at Katy’s Place and then head to one of my favorite places in the world, the Monterrey Bay Aquarium. I am not joking. I even looked into having my wedding there. (For the record you can and it would have been awesome)  How could you not love a place that has this fish just hanging out staring back at you?

sunfish

Sunfish {via}

After the aquarium, take the 17-mile drive through Pebble Beach and head back to the hotel for an early shower.

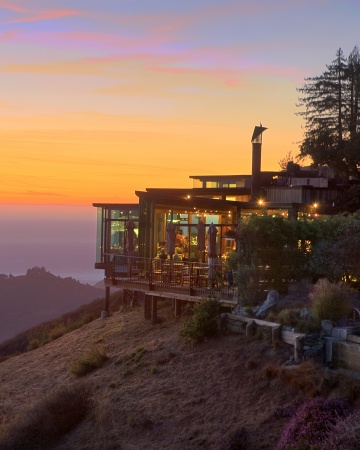
After getting ready, head south on Route 1 to Big Sur. Consider stopping at Henry Miller Library en route,  but the ultimate goal is the Post Ranch Inn. In my next life when I am a billionaire, I am going to see if I can live at the Post Ranch Inn.  Sadly I can’t afford to stay there or even eat there, but the trick is to have a drink there at sunset. It literally feels like you are at the edge of the world.

post ranch inn

{via}

After one- drink (only 1 because those puppies are like $20 a pop) head to the Big Sur Bakery for more affordable, yet equally delicious food and drinks.  Don’t be fooled because this restaurant is behind a gas station – it is amazing. I like it so much that I even have their cookbook.

Big Sur bakery

After a delicious dinner,  back to the hotel and fall asleep with the windows open to the sound of the barking sea lions.

Sunday

Another morning coffee on the beach- because you can never have too many of those- and then off to a hike. Big Sur has some pretty fantastic hikes, so check this or this site out for various hikes.

Julia-Pfeiffer-Path100dpi

{via}

Big-Sur-California-Waterfalls-McWay-Falls-2006-3

{via}

After a hike, head to  Nepenthe for lunch and this view before heading back to real life.

Nepenthe

{via}

3 Comments

Filed under Travel, Wanderlust

Wanderlusting…

Wanderlust

I have a serious case of wanderlust.

camle

Not sure why, but I can’t seem to focus on work and just keep daydreaming about far off lands. The NY Times guide to 2013 travel – didn’t help, so I decided to give in and start planning all the places I want to visit (ideally in 2013!). Some made the NY Times list and some are places that have been on my personal list for a while.  Here they are – in no particular order. Anyone want to join me?!

Marrakech, Morocco

Marrakech3

Marrakech2

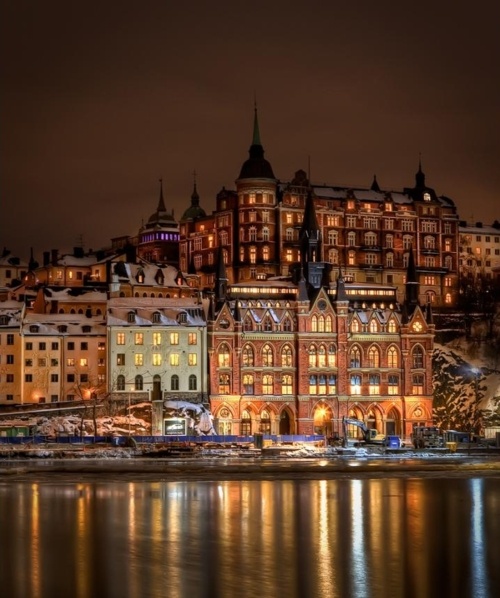
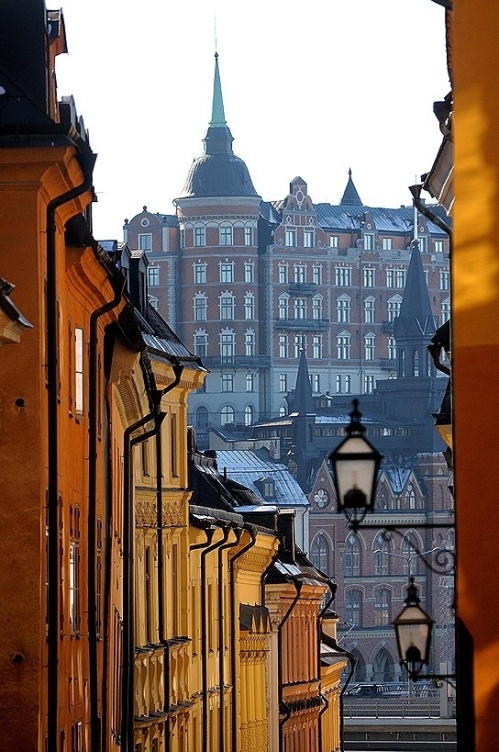
Stockholm, Sweden

stockholm

stockholm 2

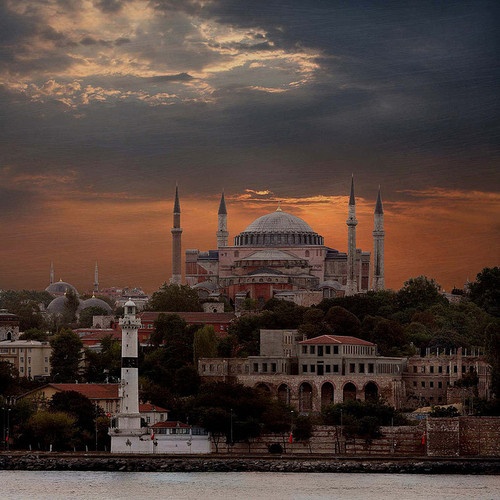
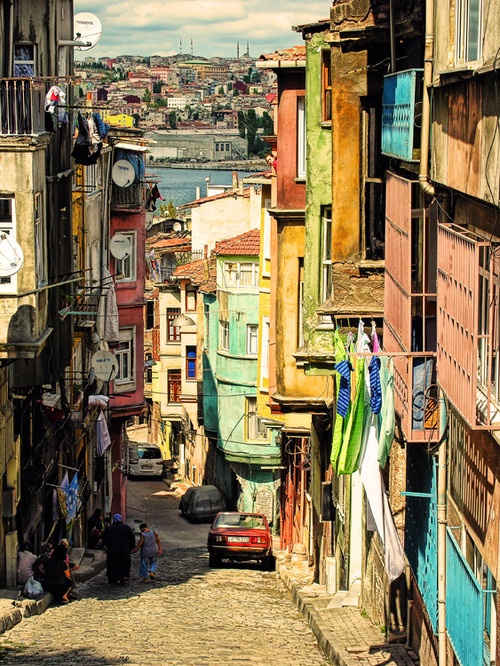
Istanbul, Turkey

Hagia Sofia Istanbul

Muscat, Oman 

Oman2oman 3

Bali, Indonesia

Indonesia

Bali

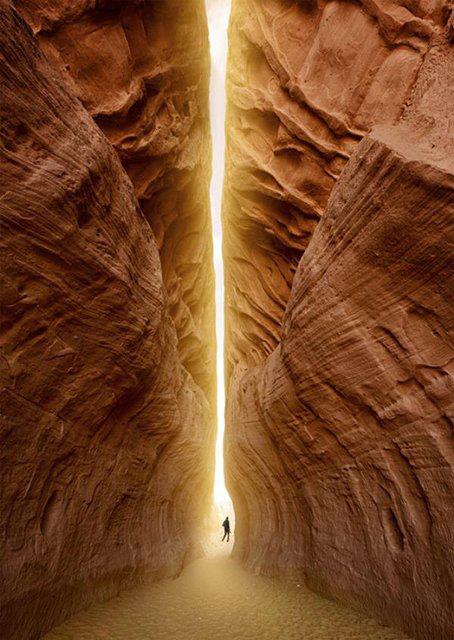
Petra, Jordan

Petra,-Jordan

Rose-Red-City-Petra-Jordan

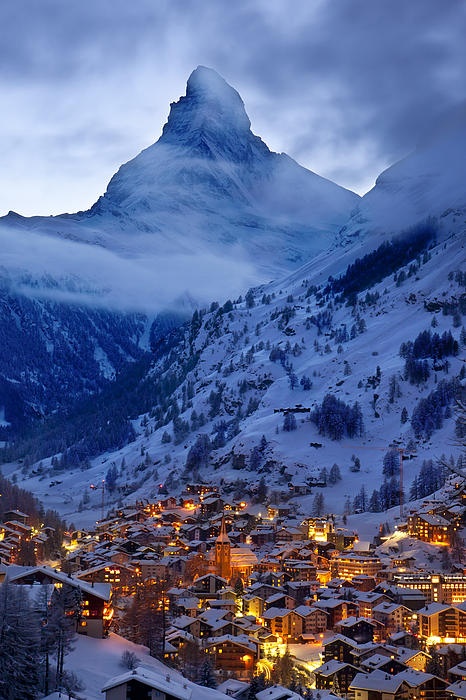
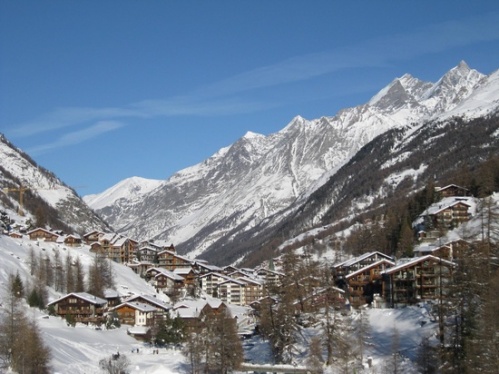
Zermatt, Switzerland 

Switzerland

Switzerland 2

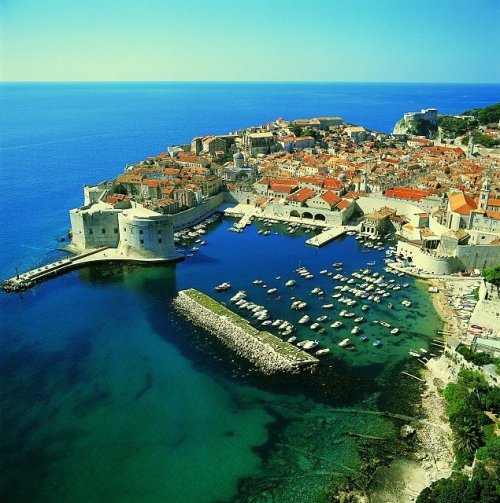
Dubrovnik, Croatia

Croatia

Dubrovnik, Croatia

This list could go on forever…but maybe that is the point of wanderlusting…

the_world_is_a_book-1

5 Comments

Filed under Travel, Wanderlust

Westminster Dog Show, Obsessed

I know, it is a weird thing to be obsessed with, but I love the Westminster Kennel Club dog show. Absolutely love it.  Why wouldn’t you? Once a year you get to see incredible dogs and their weird eccentric owners get all fancy and formal. (For the record, I am also one of those weird eccentric dog owners) Also it brings out the strangest dog breeds in the world. Like this one! The 2013 Best in Show was Banana Joe, the Affenpinscher:

Bananna Joe_Best In Show

(*all of these fantastic pics courtesy of NY Times)

I love that his name is Banana Joe. Have you ever see that breed of dog walking down the street or playing fetch at the beach, I sure haven’t. I think he won because he has an awesome name.

The NY Times has a full list/pictures of the best in breed, but here are my favorites, enjoy!

Brix, the Bulldog

Westminster Dog Show project. Day 1.

Ryder, the Afghan Hound

Westminster Dog Show project. Day 1.

Dui, the Otterhound Westminster Dog Show project. Day 1.

Tiger, the Basset Hound Westminster Dog Show project. Day 2.

Swagger, the Old English Sheep Dog (Where is Swagger’s face?!)Westminster Dog Show project. Day 1.

Runner, the BeagleWestminster Dog Show project. Day 1.

Armani, the Mexican Hairless Dog Westminster Dog Show project. Day 1.

Finnegan, a Glen of Imaal Terrier

Westminster Dog Show project. Day 2.  

Rigby, the Bedlington Terrier (is this even a dog?)

Westminster Dog Show project. Day 2.

Biff, the Wirehaired Dachshund ( I sort of love him)

Westminster Dog Show project. Day 1.

Crusader, the Dogue de Bordeaux

Westminster Dog Show project. Day 2.

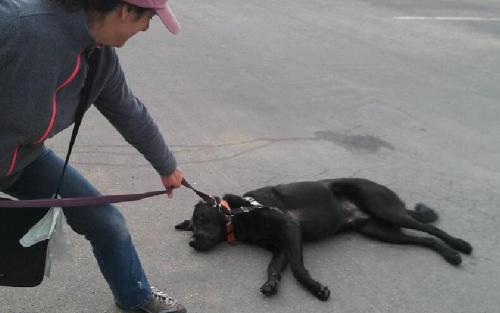
P.S. Chumley goes on a daily walk while Luke and I are at work. He gets to go to amazing places like Crissy Field and the beach while we sit at our desks and work.  This is the picture I just got (literally 5 minutes ago) of Chumley refusing to leave the beach. I don’t know about you, but he has got 2014 Best in Show in the bag with this move. Diva!

Chumley

Leave a comment

Filed under Chumley, Life